Luminous Painting Effect using Oil Paint Filter
In today's tutorial, we will combine two of my favorite techniques - Soft Glow filter mounting and oil painting - a beautiful picturesque effect with softer, brighter detail as possible with oil paint to produce filtered.
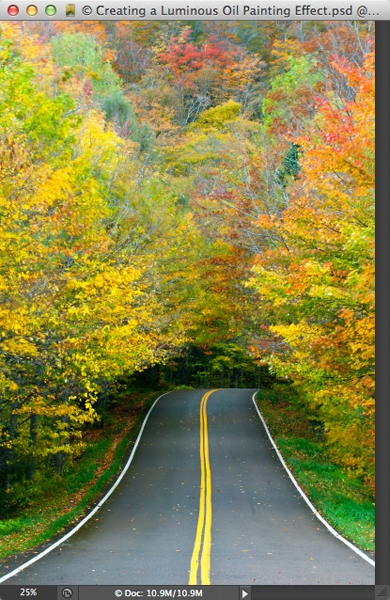
Step 1: Open a Photo with Lots of Colorful Details
This technique works best on subjects with lots of tiny colorful details, such as fall foliage, flowering trees, or wildflower meadows.
Step 2: Use Levels to Overexpose the Original
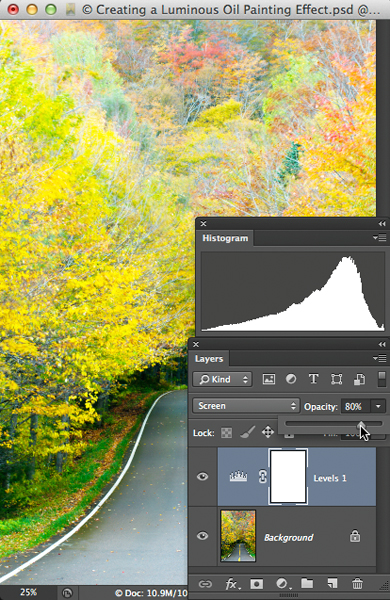
The Soft-Glow effect that we’ll apply in the next step substantially darkens the photo, so we’ll begin our process by overexposing the photo to compensate for this darkening effect. While holding Option (PC: Alt), choose Layer>New Adjustment Layer>Levels. In the New Layer dialog, change the Mode to Screen.

Press OK. Open the Histogram panel (Window>Histogram).
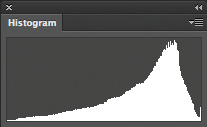
If there is a noticeable spike on the far right side (indicating blown out highlights), open the Layers panel and reduce the opacity of the Levels layer until the spike moves just slightly away from the far right.
Step 3: Add a Soft-Glow Effect
While pressing Option (PC: Alt), choose Layer>Merge Visible to create a composite layer at the top of the layer stack. Near the top of the Layers panel, change the blend mode from Normal to Multiply. Notice how the scene darkens and the colors intensify.
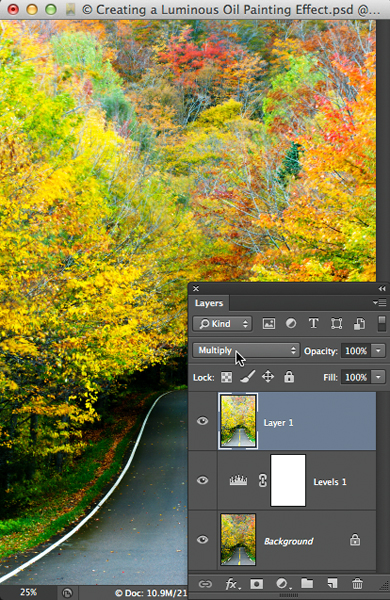
For the sake of non-destructive, fully reversible editing, convert the layer to a smart object by choosing Filter>Convert for Smart Filters. Now we’ll add an ethereal glow by choosing Filter>Blur>Gaussian Blur. Pick a Radius value that imparts a dreamlike feeling and softens some of the fine details.
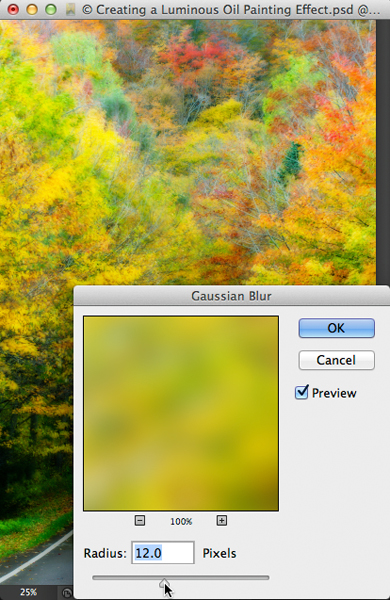
Press OK.
Step 4: Add an Oil Paint Effect
While holding Option (PC: Alt), choose Layer>Merge Visible to create another composite layer at the top of the layer stack. Choose Filter>Convert for Smart Filters. From the Filter menu, select Oil Paint. In the bottom left corner of the dialog, zoom the scene to either 50 or 100% magnification. Explore all six sliders until the image has a lovely luminous oil paint appearance.
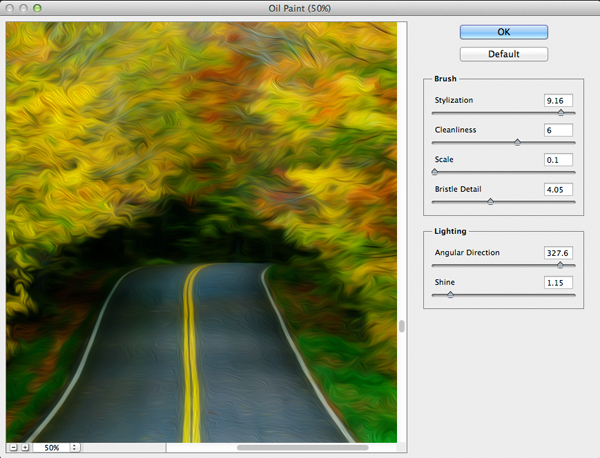
Press OK.
Step 5: Selectively Paint in Light
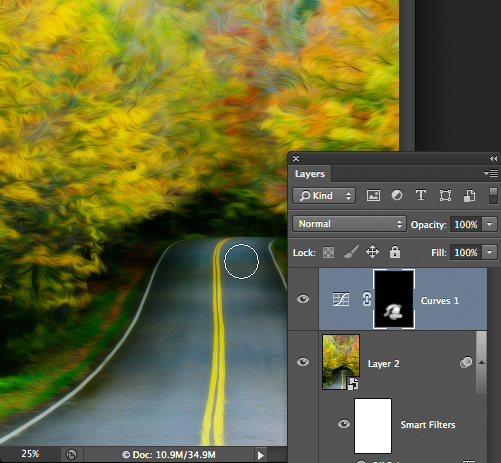
To complete the effect, we’ll use a Curves adjustment layer and its mask to selectively paint light into the scene. Choose Layer>New Adjustment Layer>Curves. When the New Layer dialog pops up, click OK. In the Properties panel, click on the Hand-with-Arrows icon to activate the on-image controls.
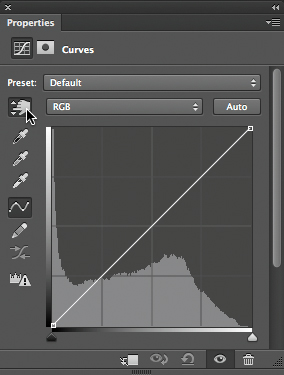
Hover over an area where you’d like to add light (such as the road in this example) and click-and-drag upward to lighten all regions in the photo that have a similar tonal value.
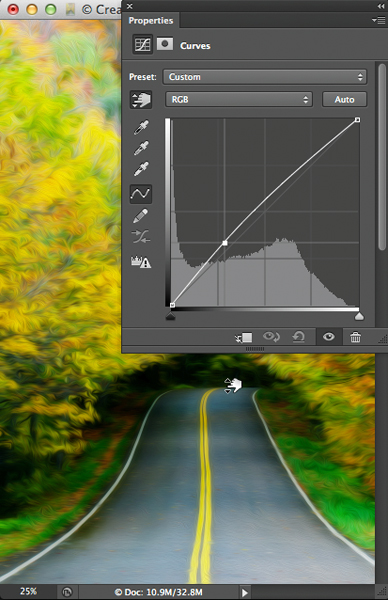
Ensure that the Curves layer mask is active and press Command-I (PC: Control-I) to fill the mask with black. Grab a soft-edged white brush set to 50% opacity and begin painting over areas where you’d like to see more light. Build in the effect by painting over regions more than once.
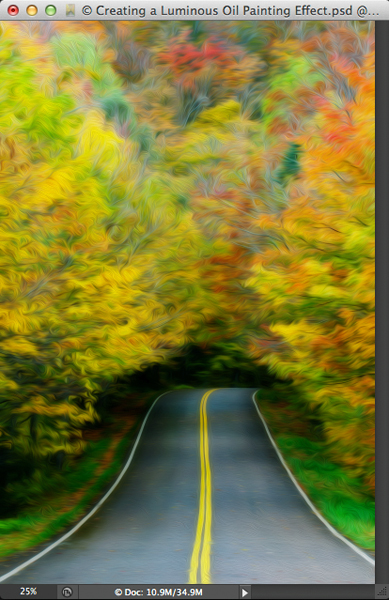
Here’s the completed effect.
And here’s a cross-section at 50% magnification.
Step 1: Open a Photo with Lots of Colorful Details
This technique works best on subjects with lots of tiny colorful details, such as fall foliage, flowering trees, or wildflower meadows.

Step 2: Use Levels to Overexpose the Original
The Soft-Glow effect that we’ll apply in the next step substantially darkens the photo, so we’ll begin our process by overexposing the photo to compensate for this darkening effect. While holding Option (PC: Alt), choose Layer>New Adjustment Layer>Levels. In the New Layer dialog, change the Mode to Screen.

Press OK. Open the Histogram panel (Window>Histogram).

If there is a noticeable spike on the far right side (indicating blown out highlights), open the Layers panel and reduce the opacity of the Levels layer until the spike moves just slightly away from the far right.

Step 3: Add a Soft-Glow Effect
While pressing Option (PC: Alt), choose Layer>Merge Visible to create a composite layer at the top of the layer stack. Near the top of the Layers panel, change the blend mode from Normal to Multiply. Notice how the scene darkens and the colors intensify.

For the sake of non-destructive, fully reversible editing, convert the layer to a smart object by choosing Filter>Convert for Smart Filters. Now we’ll add an ethereal glow by choosing Filter>Blur>Gaussian Blur. Pick a Radius value that imparts a dreamlike feeling and softens some of the fine details.

Press OK.
Step 4: Add an Oil Paint Effect
While holding Option (PC: Alt), choose Layer>Merge Visible to create another composite layer at the top of the layer stack. Choose Filter>Convert for Smart Filters. From the Filter menu, select Oil Paint. In the bottom left corner of the dialog, zoom the scene to either 50 or 100% magnification. Explore all six sliders until the image has a lovely luminous oil paint appearance.

Press OK.
Step 5: Selectively Paint in Light
To complete the effect, we’ll use a Curves adjustment layer and its mask to selectively paint light into the scene. Choose Layer>New Adjustment Layer>Curves. When the New Layer dialog pops up, click OK. In the Properties panel, click on the Hand-with-Arrows icon to activate the on-image controls.

Hover over an area where you’d like to add light (such as the road in this example) and click-and-drag upward to lighten all regions in the photo that have a similar tonal value.

Ensure that the Curves layer mask is active and press Command-I (PC: Control-I) to fill the mask with black. Grab a soft-edged white brush set to 50% opacity and begin painting over areas where you’d like to see more light. Build in the effect by painting over regions more than once.

Here’s the completed effect.

And here’s a cross-section at 50% magnification.


